
Greeting your customers with a personalized shopping experience is high-priority for most of the retails / online business owners these days. When personalization is done correctly on your business website and your revenue are going up, this is a sign that you as a retailer / business owner understand your customers needs.
According to Oracle RightNow Customer Experience Impact (CEI) Report:
• 86 percent of consumers will pay more for a better customer experience
• 89 percent of consumers began doing business with a competitor following a poor customer experience
In this article, we will discuss 3 ways to create a personalized shopping experience on nopCommerce site.
1) Displaying customer name on the header
In this section, we will learn how to display customer name on the header of y our nopCommerce site by custom code.
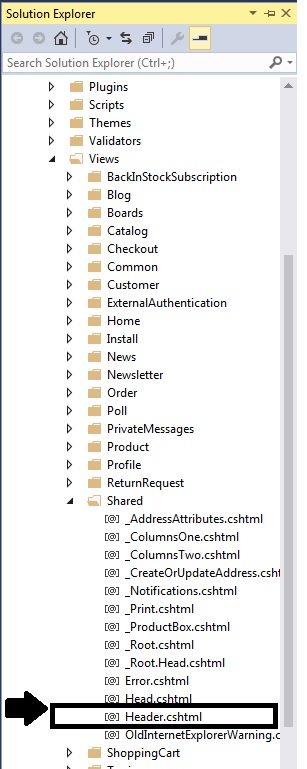
Go to: Nop.Web / Views / Shared
Open the view file "Header.cshtml"
Add this at the top:
@using Nop.Core.Infrastructure;
@using Nop.Core;
@using Nop.Core.Domain.Customers;
@using Nop.Services.Common;
Please find this DIV:
 <div class="header-links-wrapper">
            @Html.Action("HeaderLinks", "Common")
            @Html.Action("FlyoutShoppingCart", "ShoppingCart")
        </div>
Now, we will add customer name like this:
@{
                var currentCustomer = EngineContext.Current.Resolve<IWorkContext>().CurrentCustomer;

                if (!currentCustomer.IsGuest())
                {
                    var name = currentCustomer.GetAttribute<string>(SystemCustomerAttributeNames.FirstName);

                    if (!string.IsNullOrEmpty(name))
                    {
                        <br />
                        <div>Hello @name, how are you doing today?</div>
                        <br />
                    }
                }

            }
In the above code, we are checking if customer is not guest (i.e. for logged in customers only) and then first name will be displayed with the hardcoded text. Your final DIV should look something like this after adding the above code:
 <div class="header-links-wrapper">

            @{
                var currentCustomer = EngineContext.Current.Resolve<IWorkContext>().CurrentCustomer;

                if (!currentCustomer.IsGuest())
                {
                    var name = currentCustomer.GetAttribute<string>(SystemCustomerAttributeNames.FirstName);

                    if (!string.IsNullOrEmpty(name))
                    {
                        <br />
                        <div>Hello @name, how are you doing today?</div>
                        <br />
                    }
                }

            }

            @Html.Action("HeaderLinks", "Common")
            @Html.Action("FlyoutShoppingCart", "ShoppingCart")
        </div>
Save changes!
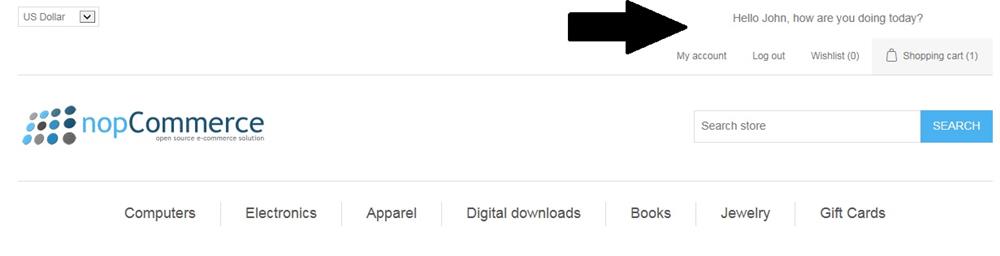
Run your website / project and your customer should be able to see their first name at the top of your website (in header section) once they log in:
2) Displaying customer name in a popup window
When you install nopCommerce, you get an option to display (or showcase) new products in a separate page. In order to display products on that webpage, you have to enable a setting for your products which is "Mark as new".
Now, we will add a new personalized option to this feature so that new products get more exposure. We will be adding a personalized popup window that will give your customers a link to new products page.
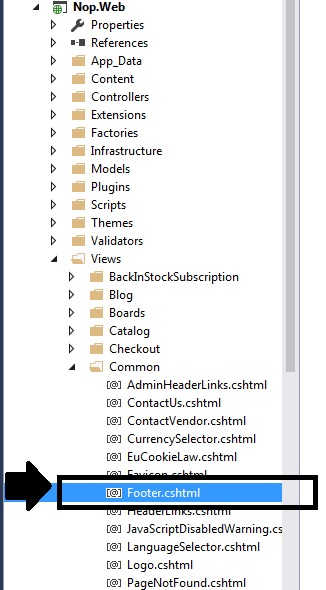
Go to: Nop.Web / Views / Common
Open the view file "Footer.cshtml"
Add this at the top:
@using Nop.Core.Domain.Customers;
@using Nop.Services.Common;
Add this code at the bottom of your view file:
@if (Model.NewProductsEnabled)
{

    <div>


        @{
            var currentCustomer = EngineContext.Current.Resolve<IWorkContext>().CurrentCustomer;

            if (!currentCustomer.IsGuest())
            {
                var name = currentCustomer.GetAttribute<string>(SystemCustomerAttributeNames.FirstName);

                if (!string.IsNullOrEmpty(name))
                {
                    <div class="sp-newproducts">
                        <div id="customnameValue" style="font-weight:bold;display: inline-block;">Hi @name,<br />Check out these <a href="@Url.RouteUrl("NewProducts")">new products</a></div>

                    </div>
                }
            }

        }
    </div>


            }
In the above code, we are first checking if New Product functionality is enabled or not. If enabled, then we are checking if customer is not guest (i.e. for logged in customers only) and then first name will be displayed along with the new products page link.
Let's add some styling that will manage the position of this popup window.
Add the below CSS to your theme's stylesheet:
    .sp-newproducts {
        border-radius: 5px 5px 0 0;
        background: #4ab2f1;
        padding: 5px;
        width: 235px;
        position: fixed;
        bottom: 0;
        right: 50px;
        color: #ffffff;
    }

        .sp-newproducts a {
            color: black;
        }
Save changes!
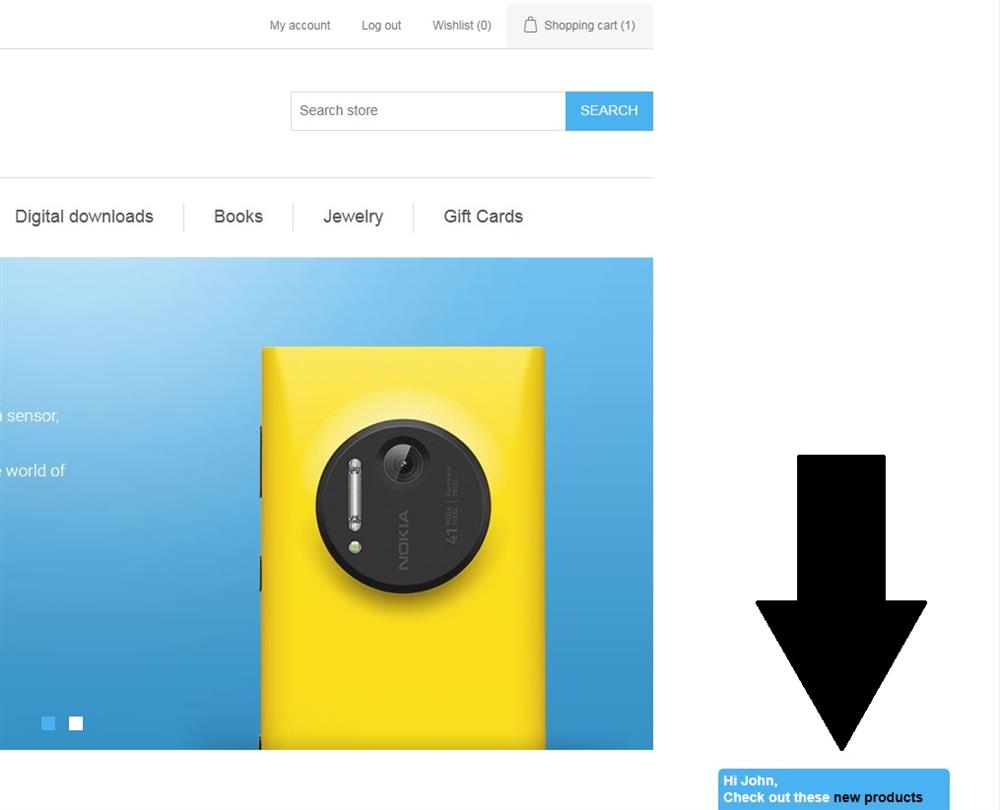
Run your website / project and your customer should be able to see their first name at the top of your website (in header section) once they log in:
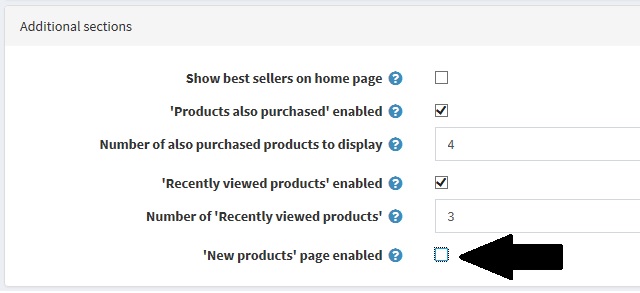
NOTE: One benefit of creating this custom functionality is that, if you decide to NOT use the "new product" page or functionality, you just have to turn off / disable that feature in nopCommerce administration section and this add-on feature will automatically be disabled as well.
To turn off, all you have to is (uncheck this):
3) Message Templates
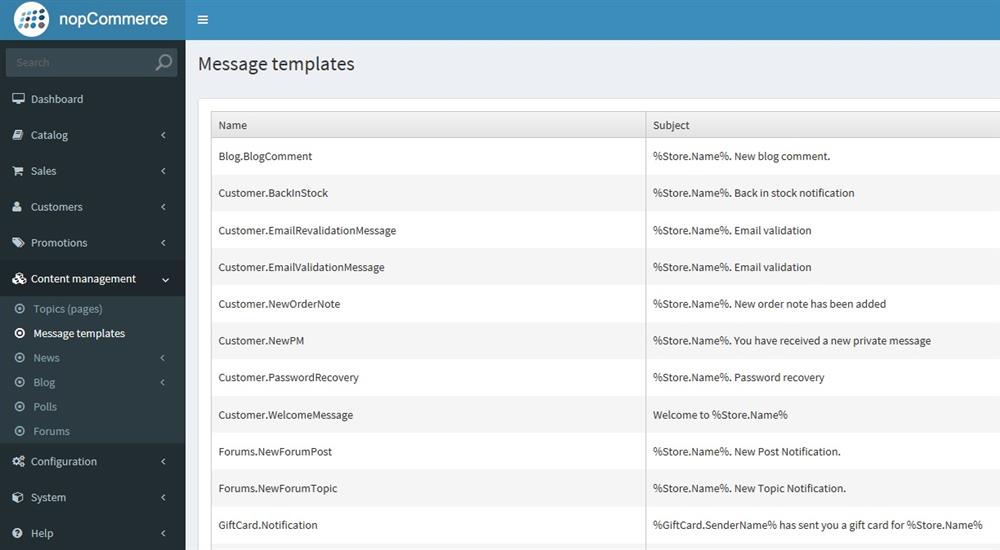
In nopCommerce, message templates define the layout, content, and formatting of automated messages sent from your store site. They are called transactional emails because each one is associated with a specific type of transaction. There are several message templates available in nopCommerce by default to notify the users / customers about order statuses and so on.
These message templates gives you a great opportunity to create personalized experience for your customers and online shoppers by making sure you have dynamic tokens set in the content like customer name, location etc.
You can access message templates by going to: Content management > Message templates
Let's add customer name in the welcome email that customers get after registering on the store site.
Click on "Edit" for the message template "Customer.WelcomeMessage"
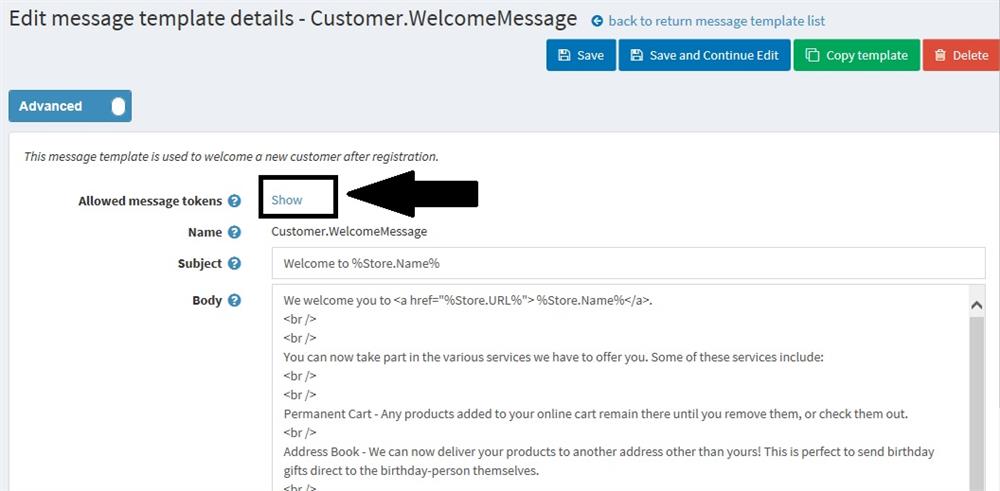
As soon as you click on the "Show" link, you will see all the allowed tokens that you can add to the email content for your store.
NOTE: You can add conditions as well in order to display different information for different cases.

In the example (below), we have added customer's first name token in the welcome email like this:
Hi %Customer.FirstName%,
<br />
<br />
We welcome you to <a href="%Store.URL%"> %Store.Name%</a>.
<br />
<br />
You can now take part in the various services we have to offer you. Some of these services include:
<br />
<br />
Permanent Cart - Any products added to your online cart remain there until you remove them, or check them out.
<br />
Address Book - We can now deliver your products to another address other than yours! This is perfect to send birthday gifts direct to the birthday-person themselves.
<br />
Order History - View your history of purchases that you have made with us.
<br />
Products Reviews - Share your opinions on products with our other customers.
<br />
<br />
For help with any of our online services, please email the store-owner: <a href="mailto:%Store.Email%">%Store.Email%</a>.
<br />
<br />
Note: This email address was provided on our registration page. If you own the email and did not register on our site, please send an email to <a href="mailto:%Store.Email%">%Store.Email%</a>.