Following on from the previous article Beginner's Guide to nopCommerce Theme Development (ASP.NET MVC Based e-Commerce Solution)– Part 1, this part will cover all the remaining aspects of nopCommerce theme development that includes:
· Views
· Override views
· Layouts
· Adding JS & CSS references
· Customization
All these topics in this article (including part-1) should get you well introduced into nopCommerce theming and help you in making advanced customizations in regard to layout and design.
Let’s talk about Views in ASP.NET MVC & nopCommerce
Before we go further and talking about layout / design, first we need to understand the HTML markup (i.e. Views). What is an ASP.NET MVC View and how does it differ from a HTML page?
For ASP.NET or Active Server Pages, ASP.NET MVC does not include anything that directly corresponds to a page. In an ASP.NET MVC application, there is not a page on disk that corresponds to the path in the URL that you type into the address bar of your browser. The closest thing to a page in an ASP.NET MVC application is something called a view. ASP.NET MVC application, incoming browser requests are mapped to controller actions. A controller action might return a view. However, a controller action might perform some other type of action such as redirecting you to another controller action. (Source: http://www.asp.net/mvc/)
· Web Form’s ASCX can be considered a VIEW in MVC
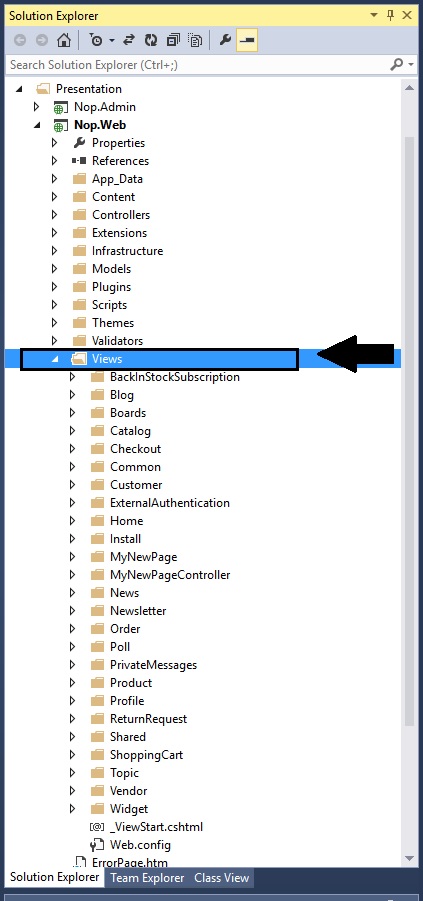
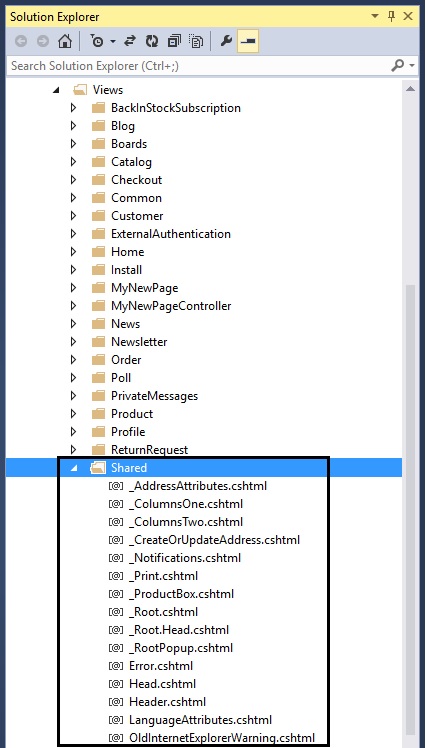
In nopCommerce, you can find all the views in “Nop.Web/Views…” that consists of all the directories and respective MVC actions.
A few examples:
If you like to make change in your homepage, you will look into:
· Views/Home/Index.cshtml
If you like to make changes in your top menu, you will look into:
· Views/Catalog/TopMenu.cshtml
If you like to make changes in your contact us page, you will look into:
· Views/Common/ContactUs.cshtml
All these views in nopCommerce contain razor code & HTML markup. Within these views, you will also see “Partial Views”. Now, the question is – What are Partial Views?
A partial view enables you to define a view that will be rendered inside a parent view. Partial views are implemented as ASP.NET user controls (.ascx).
When a partial view is instantiated, it gets its own copy of the ViewDataDictionary object that is available to the parent view. The partial view therefore has access to the data of the parent view. However, if the partial view updates the data, those updates affect only the partial view's ViewData object. The parent view's data is not changed.
By using partial view we can render a view inside a parental view and to create reusable content in the project. (Source: http://mvc4beginner.com/)
A few examples:
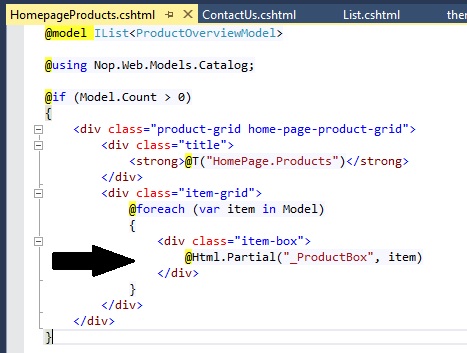
· A product template view “HomepageProducts.cshtml” consists a partial view “_ProductBox” like this:
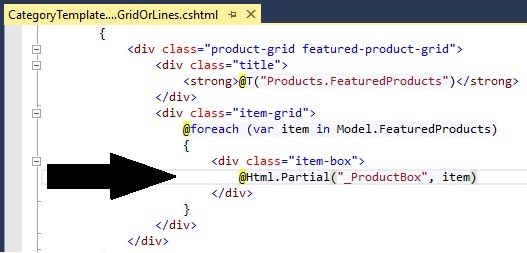
· A category template view “CategoryTemplate.ProductsInGridOrLines.cshtml” consists a partial view “_ProductBox” like this:
Overriding views in nopCommerce with custom theme
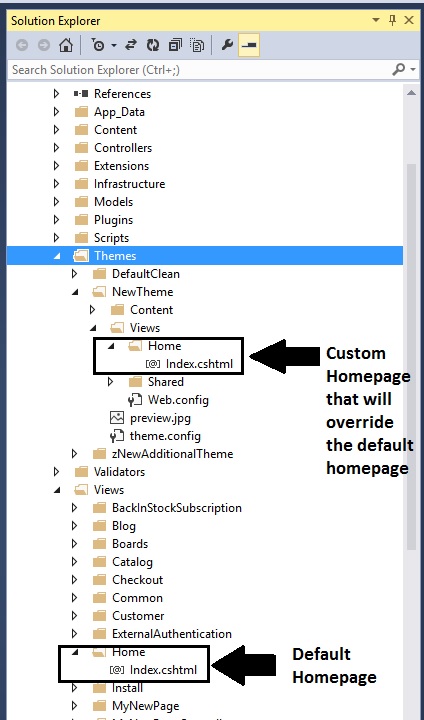
One of the best features of ASP.NET MVC framework is its pluggable architecture. This pluggable architecture allows you to completely replace the default view engine with a custom one. You can do the same in nopCommerce by adding custom views in your custom theme and override the default views. This way, you do not have to make any kind of changes in the default views and by installing and uninstalling a theme, you can add or remove the custom views easily.
You can do the same for layouts in nopCommerce theme and can easily override the layouts like _ColumnsOne.cshtml, _ColumnsOne.cshtml or _Root.cshtml etc. This allows you to add your custom layouts with custom css or JS references so that you can change the design of nopCommerce store site via a custom theme.
For example:
· If you would like to override the homepage, simply place your “new/custom” homepage view in this location: Views/Home
Understanding Layout / Design
Now that we have a good understanding of Views, let’s talk about layouts - What are layouts? Every web developer / designer wants to maintain a consistent look and feel across all of the pages within the website. Back in the days, the concept of "Master Pages" was introduced in ASP.NET 2.0 which helps in maintaining a consistent look of the website by mapping it with .aspx pages.
Razor also supports this similar concept with a feature called "Layouts". Basically, it allows you to define a common site template and then inherit its look and feel across all the views/pages on your website. You can ready this outstanding post by Scott Guthrie explaining how you can implement a common site layout scenario with ASP.NET MVC 3 and Razor. (Source: http://weblogs.asp.net/scottgu)
If you are interested in learning more about “Razor”, you should definitely checkout this another great post by Scott Guthrie - Introducing “Razor” – a new view engine for ASP.NET
In nopCommerce, there are 2 different kinds of layouts:
· _ColumnsOne.cshtml
· _ColumnsTwo.cshtml
All these 2 layouts are inherited from one main layout called: _Root.cshtml. The _Root.cshtml itself is inherited from _Root.Head.cshtml. _Root.Head.cshtml is the file you need to look into if you are linked css stylesheet and jquery files (you can add / link more .css and .js files here).
The location of all these layouts in nopCommerce is as follows: nopCommerce root directory/Views/Shared/... .
If you are using source code version then: \Presentation\Nop.Web\Views\Shared\...
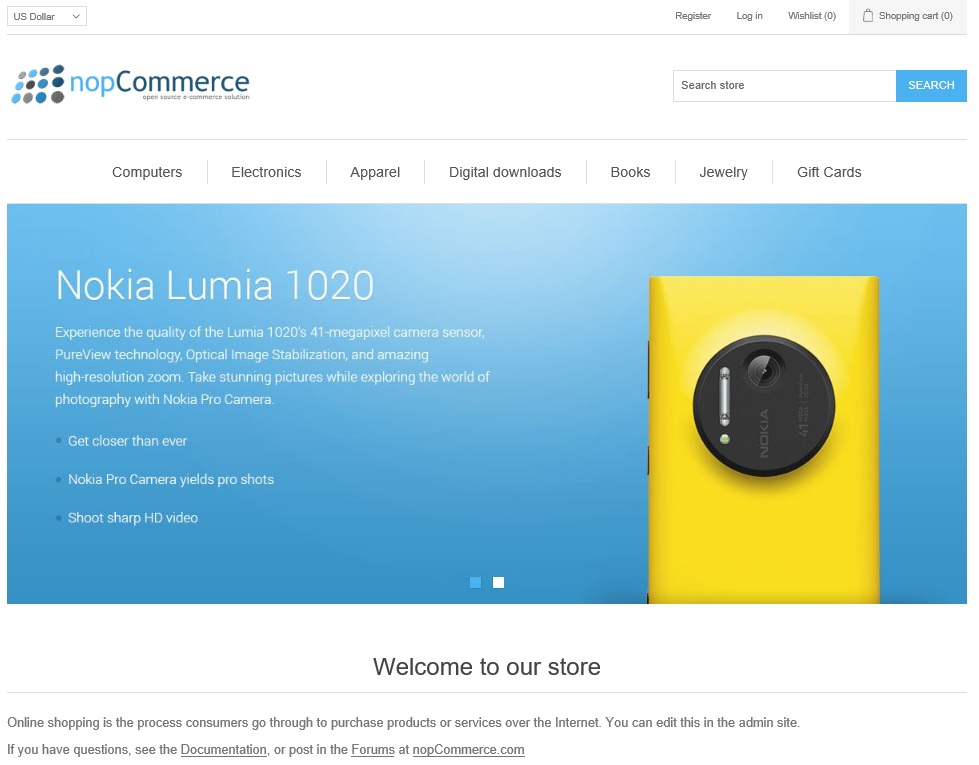
The homepage in nopCommerce site use the layout “_ColumnsOne.cshtml” by default:
@{ Layout = "~/Views/Shared/_ColumnsTwo.cshtml";}<div class="page home-page"> <div class="page-body"> @Html.Widget("home_page_top") @Html.Action("TopicBlock", "Topic", new { systemName = "HomePageText" }) @Html.Widget("home_page_before_categories") @Html.Action("HomepageCategories", "Catalog") @Html.Widget("home_page_before_products") @Html.Action("HomepageProducts", "Product") @Html.Widget("home_page_before_best_sellers") @Html.Action("HomepageBestSellers", "Product") @Html.Widget("home_page_before_news") @Html.Action("HomePageNews", "News") @Html.Widget("home_page_before_poll") @Html.Action("HomePagePolls", "Poll") @Html.Widget("home_page_bottom") </div></div>
Here is the output
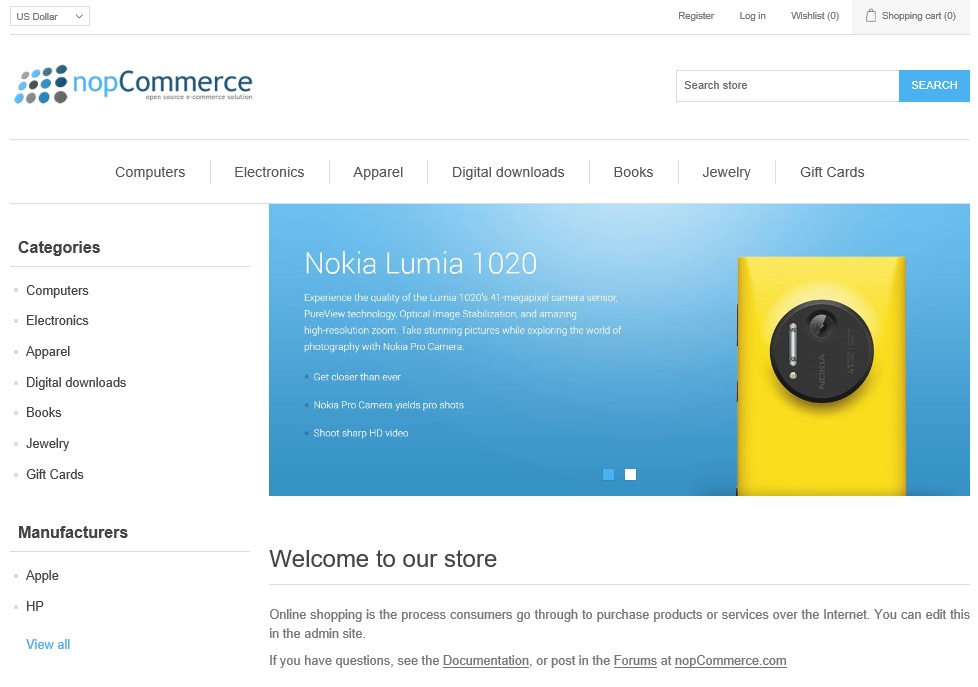
If you would like to use “_ColumnsTwo.cshtml” layout, simply change the name of the layout like this in the homepage:
@{ Layout = "~/Views/Shared/_ColumnsTwo.cshtml";}<div class="page home-page"> <div class="page-body"> @Html.Widget("home_page_top") @Html.Action("TopicBlock", "Topic", new { systemName = "HomePageText" }) @Html.Widget("home_page_before_categories") @Html.Action("HomepageCategories", "Catalog") @Html.Widget("home_page_before_products") @Html.Action("HomepageProducts", "Product") @Html.Widget("home_page_before_best_sellers") @Html.Action("HomepageBestSellers", "Product") @Html.Widget("home_page_before_news") @Html.Action("HomePageNews", "News") @Html.Widget("home_page_before_poll") @Html.Action("HomePagePolls", "Poll") @Html.Widget("home_page_bottom") </div></div>
Here is the output
Adding JS & CSS references in your nopCommerce theme
Some developers or web designers follow different ways to add resources / references into the web files, each way carry its own advantage and disadvantage. So, we are not going to go over what is the “correct” way of adding references because this can lead to a never ending debate.
So, we are going to discuss what is the best “recommended” way to add CSS and JS resource files in nopCommerce project.
In order to load your resource files correctly in the view pages, you can use the following helper methods:
- Html.AddScriptParts(): For loading JS files
- Html.AddCssFileParts(): For loading CSS files
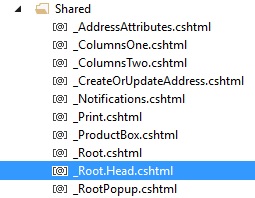
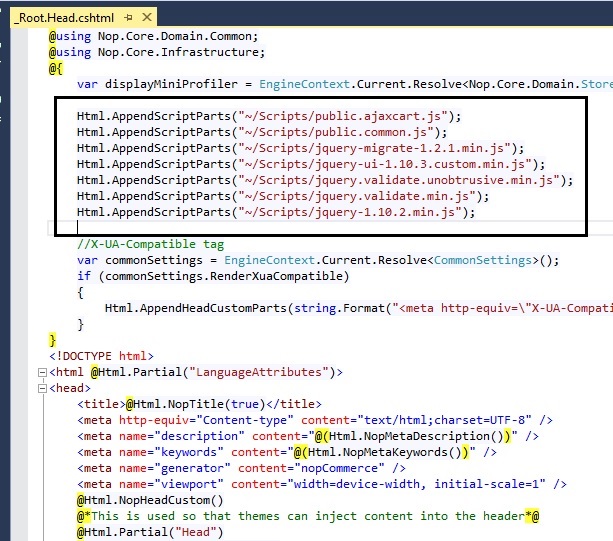
If you go to: Nop.Web/Views/Shared/ _Root.Head.cshtml
You can add the resource files like this:
//Load JS file Html.AppendScriptParts("/Scripts/jquery-1.10.2.min.js"); //Load CSS file Html.AddCssFileParts("/CSS/styles.css");Here is an example of “_Root.Head.cshtml” in which you can see how JS scripts are being referenced:
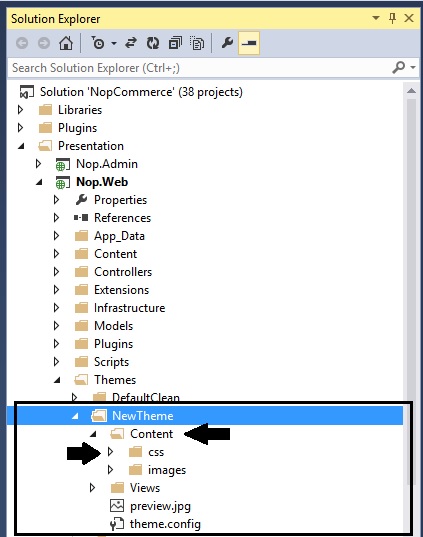
If you are creating a custom nopCommerce theme, then the best place to keep your CSS & JS files is in your theme folder:
Customizing nopCommerce Themes
Uploading your store logo
In order to upload your store logo in a nopCommerce website, there are basically 2 methods:
First Method
· Go to nopCommerce root folder /Themes/YOUR THEME/Content/images/
· Look for logo.gif image file
· Replace the logo.gif with your store logo and name it as logo.gif (with same width:310px and height:60px)
Second Method
· Save your store logo in this location: nopCommerce root folder/Themes/YOUR THEME/Content/images/
· Go to nopCommerce root folder/ Views / Shared / Header.cshtml
· Open "Header.cshtml" file
· Look for this code at the top:
var logoPath = "~/Themes/" + currentThemeName + "/Content/images/logo.png";
· You can mention the path of your custom logo here.
· In the above mentioned css code: logo.gif is the name of the store logo image file
· Change logo.gif with YourLogo.gif/jpg/png
· Save changes to the Header.cshtml file
Here is a screenshot of Header.cshtml
![]()
Important Note: You might have to refresh the browser or delete history or cookies of your browser in order to see the changes (new store logo).
If you wish to make changes in stylesheet in regard to the logo, look for the following code in your styles.css:
.header-logo { margin: 0 0 20px; text-align: center;}.header-logo a { display: inline-block; max-width: 100%; line-height: 0; /*firefox line-height bug fix*/}.header-logo a img { max-width: 100%; opacity: 1;}
Making changes to the layout
If you would like to customize / make changes in the base layout (i.e. _Root.cshtml) of your nopCommerce website. Please look for this css code in your style.css
.master-wrapper-content { position: relative; z-index: 0; width: 90%; margin: 0 auto;}.master-column-wrapper { position: relative; z-index: 0;}.master-column-wrapper:after { content: ""; display: block; clear: both;} If you would like to customize / make changes in the layout of _ColumnOne.cshtml. Please look for this css code in your style.css
.center-1 { margin: 0 0 100px;}
If you would like to customize / make changes in the layout of _ColumnTwo.cshtml. Please look for this css code in your style.css
.center-2, .side-2 { margin: 0 0 50px;}.side-2:after { content: ""; display: block; clear: both;} How to make changes in header menu (top menu)
If you would like to customize / make changes in header menu (top menu) of your nopCommerce website, please go to the following location:
· Go to nopCommerce root folder/ Views / Catalog / TopMenu.cshtml
· Open file "TopMenu.cshtml" - You can add or remove menu items in <li> according to your requirements.
This concludes the Beginner's Guide to nopCommerce Theme Development. If you have any questions, please feel free to ask.
· Here you can browse all nopCommerce themes: nopCommerce Themes & Templates
· nopCommerce Version (used in this article): Version 3.70