Entity Framework (EF) is an Object Relational Mapper (ORM) that enables developers to work with relational data using domain-specific objects. In other words, it allows developers to access and store data in the database via an automated mechanism. Before we dive deep into the details of code-first approach, we should understand the transference in a way the modern applications are being developed.
Conventionally, we have been developing data centric applications where the focus is what data is needed to justify our business needs. Hence, the traditional approach in most cases is always about building the application based on the database schema. Many developers still follow this approach and the approach is commonly known as “Entity Framework Database First Approach”. In this approach, the entity framework is created from an existing database.
On the other hand, many developers are shifting towards the alternative way of developing (and designing) applications by using Domain Centric Approach (Domain-Driven Design).
What is Domain-Driven Design (DDD)?
DDD is a collection of principles and patterns that help developers craft elegant object systems. Properly applied it can lead to software abstractions called domain models. These models encapsulate complex business logic, closing the gap between business reality and code. (Source: MSDN)
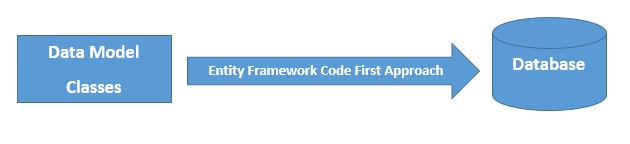
This approach is basically an opposite of data-driven approach and the focus is entities and models which is why it is known as “Entity Framework Code First Approach”. As the name implies, the classes are created first and then database is generated from the classes to fulfill the business needs. In this approach, we do not use Entity Designer (.edmx). This approach enables us to write plain-old" CLR objects (POCOs) for our models and it helps in making changes to the persistence layer without impacting the models.
What is POCO?
The Entity Framework enables you to use custom data classes together with your data model without making any modifications to the data classes themselves. This means that you can use "plain-old" CLR objects (POCO), such as existing domain objects, with your data model. These POCO data classes (also known as persistence-ignorant objects), which are mapped to entities that are defined in a data model, support most of the same query, insert, update, and delete behaviors as entity types that are generated by the Entity Data Model tools. (Source: MSDN)
Here is a graphical representation of Entity Framework Code First Approach that helps developers in easily creating classes as the requirement and database is created automatically.
Let’s create a sample web application in ASP.NET MVC that uses Entity Framework (code-first approach). In this example, we are going to create a test e-Commerce store with product table that we can add, edit and delete.
Let’s create a sample web application in ASP.NET MVC that uses Entity Framework (code-first approach). In this example, we are going to create a test e-Commerce store with product table that we can add, edit and delete.
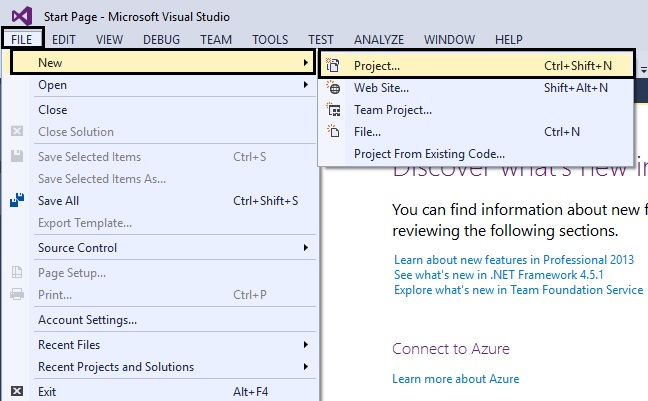
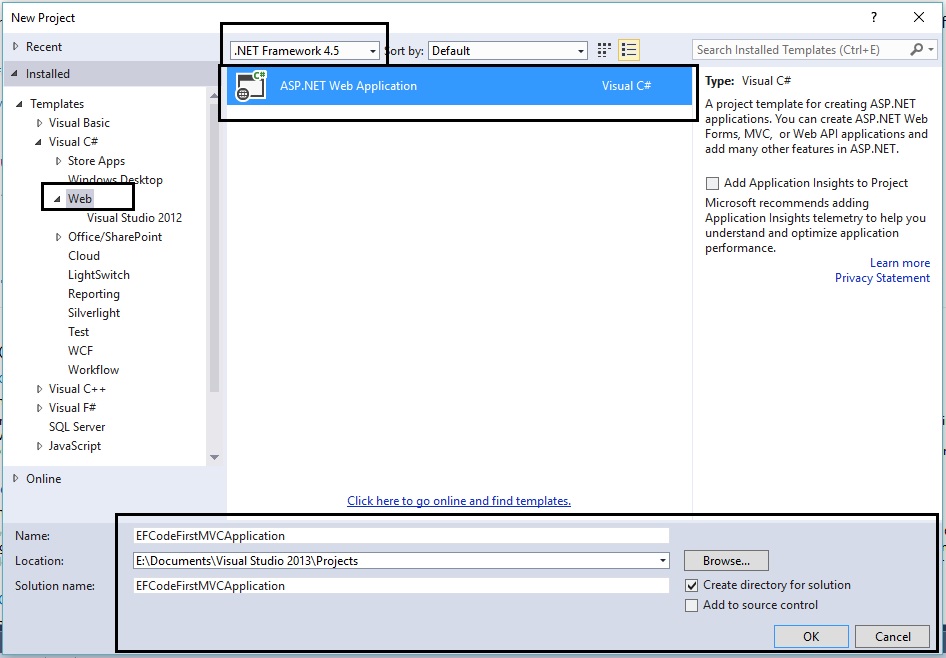
Create a new C# web project:
Let’s name this sample project as “EFCodeFirstMVCApplication”:
In the new project dialog box, we will select MVC template and click on the “Change Authentication” button:
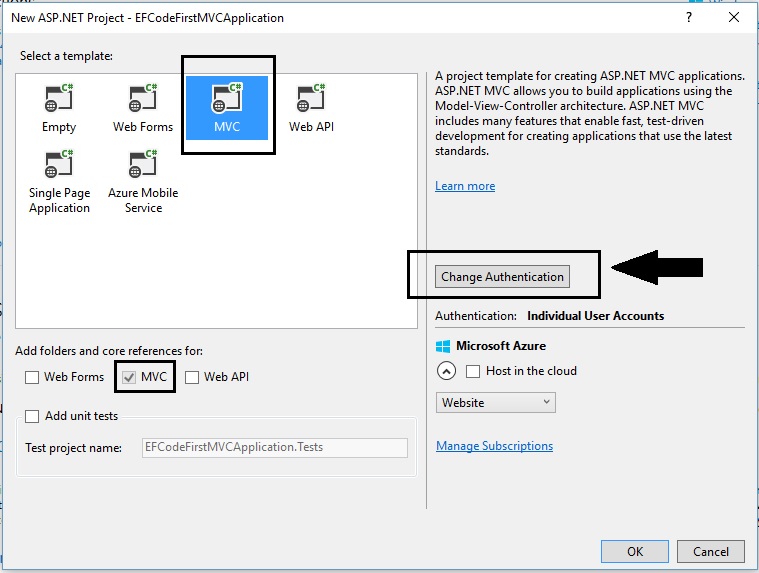
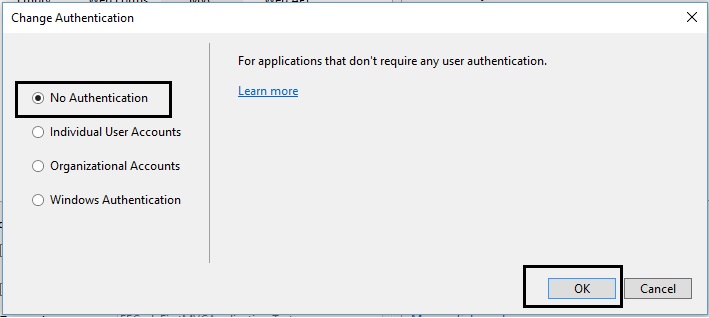
In the “Change Authentication” dialog box, we will select “No Authentication” and click OK:
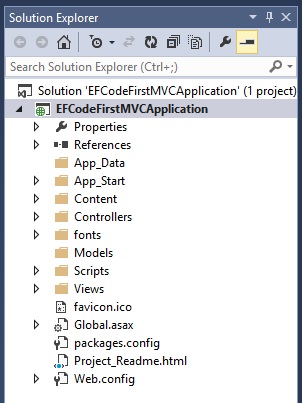
Here is the sample project in Solution Explorer:
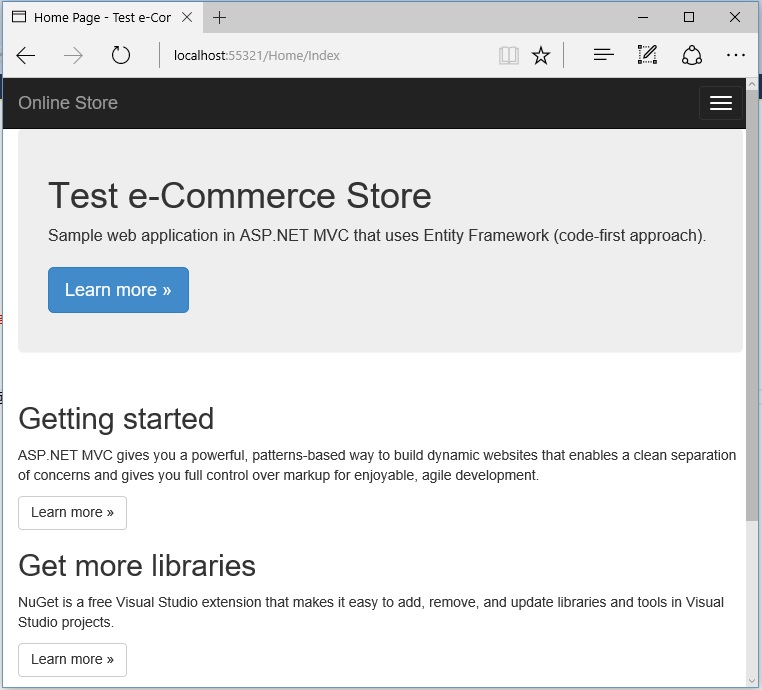
Now, we run the solution, we should see the sample web application in the browser like this:
Installing Entity Framework
Now, we need to install entity framework to your project and in order to do so, go to: Package Manager Console.
Enter the following command: Install-Package EntityFramework
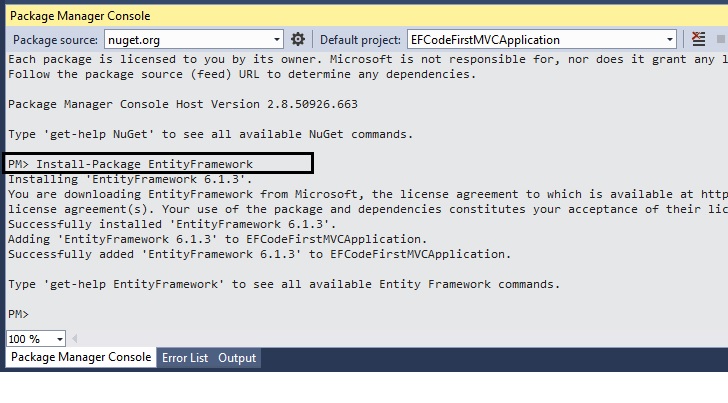
NuGet will automatically install the latest version of Entity Framework (in this example, EF 6.1.3 is being installed as this is the most recent version).
Data Model
Now, we will create entity classes for the test e-Commerce store application and in order to keep it simple, let’s create just one entity “Product” where we will maintain the product inventory / stock.
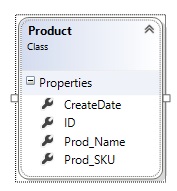
In the “Models” folder, create a new class file as “Product.cs” and use the following code:
Now, we will add a new class file named as “ProductContext.cs” with the following code:
In the above code, this is our connection string:
In the “Models” folder, create a new class file as “Product.cs” and use the following code:
using System;using System.Collections.Generic;using System.Linq;using System.Web;namespace EFCodeFirstMVCProductsApp.Models{ public class Product { public int ID { get; set; } public string Prod_SKU { get; set; } public string Prod_Name { get; set; } public DateTime CreateDate { get; set; } }}Here, the ID property will become the primary key column of the database table for the respective class (Product). By default, entity framework reads the property names as ID or classID as the primary key.
Database Content (Data Access Layer)
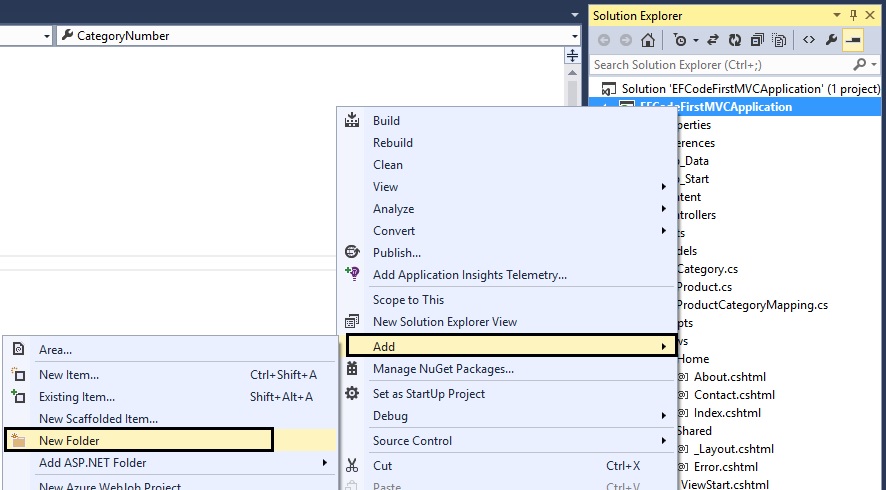
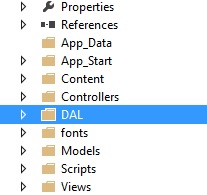
The database content class is the main class that coordinates Entity Framework functionality for a given data model. Add a new folder “DAL” which will be our Data Access Layer:
Now, we will add a new class file named as “ProductContext.cs” with the following code:
using System;using System.Collections.Generic;using System.Linq;using System.Web;using EFCodeFirstMVCProductsApp.Models;using System.Data.Entity;using System.Data.Entity.ModelConfiguration.Conventions;namespace EFCodeFirstMVCProductsApp.DAL{ public class ProductContext : DbContext { public ProductContext() : base("ProductContext") { } public DbSet<Product> Products { get; set; } protected override void OnModelCreating(DbModelBuilder modelBuilder) { modelBuilder.Conventions.Remove<PluralizingTableNameConvention>(); } }}In the above code, this is our connection string:
public ProductContext() : base("ProductContext") { }Now we can initialize the database with some test / sample data by creating a new class file “ProductInitializer.cs” in the DAL folder and use the following code:
using System;using System.Collections.Generic;using System.Linq;using System.Web;using EFCodeFirstMVCProductsApp.Models;using System.Data.Entity;namespace EFCodeFirstMVCProductsApp.DAL{ public class ProductInitializer : System.Data.Entity.DropCreateDatabaseIfModelChanges<ProductContext> { protected override void Seed(ProductContext context) { var products = new List<Product> { new Product{Prod_Name="HP Laptop",Prod_SKU="HP101",CreateDate=DateTime.Parse("2016-01-01")}, new Product{Prod_Name="Apple iPhone",Prod_SKU="Apple102",CreateDate=DateTime.Parse("2016-01-01")}, new Product{Prod_Name="Lenovo Desktop",Prod_SKU="Lenovo103",CreateDate=DateTime.Parse("2016-01-01")}, new Product{Prod_Name="T-shirt",Prod_SKU="Shirt104",CreateDate=DateTime.Parse("2016-01-01")}, }; products.ForEach(s => context.Products.Add(s)); context.SaveChanges(); } }}Now, we need to update our web.config file by adding the connection string like this:
<connectionStrings> <add name="ProductContext" connectionString="Data Source=WORKSTATIONPC\SQLEXPRESS2012;Initial Catalog=EFCodeFirstMVCApplication;Integrated Security=SSPI;" providerName="System.Data.SqlClient"/> </connectionStrings>In order to tell Entity Framework to use the initializer class that we have added in the project, an element needs to be added to web.config file like this:
<contexts> <context type="EFCodeFirstMVCApplication.DAL.ProductContext, EFCodeFirstMVCApplication"> <databaseInitializer type="EFCodeFirstMVCApplication.DAL.ProductInitializer, EFCodeFirstMVCApplication" /> </context> </contexts>Controller and Views
Now, it is time to create webpage for display data, editing data and deleting data from the database. Before, we go forward let’s build the project for making the model and content classes available to the MVC controller scaffolding.
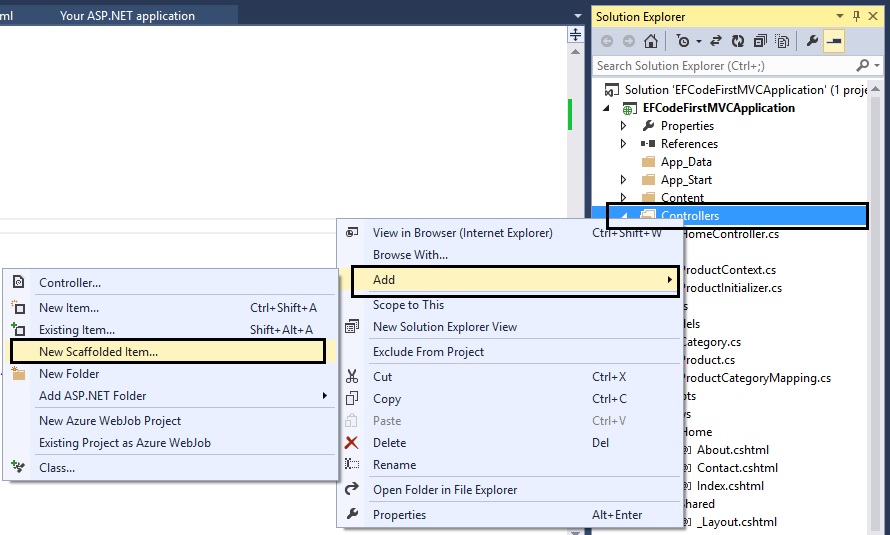
Right click on the “Controllers” folder and add “New Scaffolded item” like this:
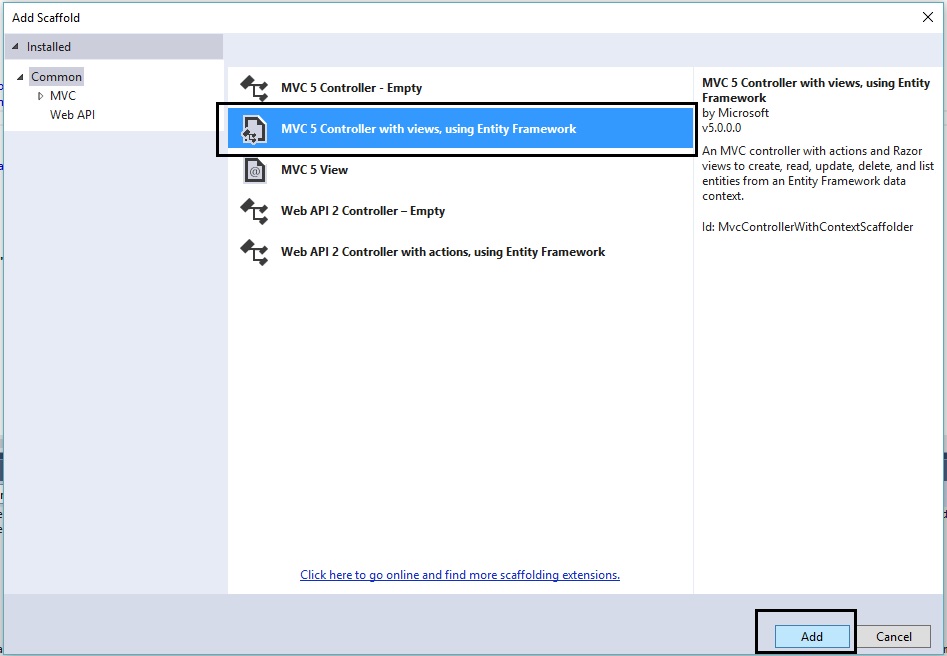
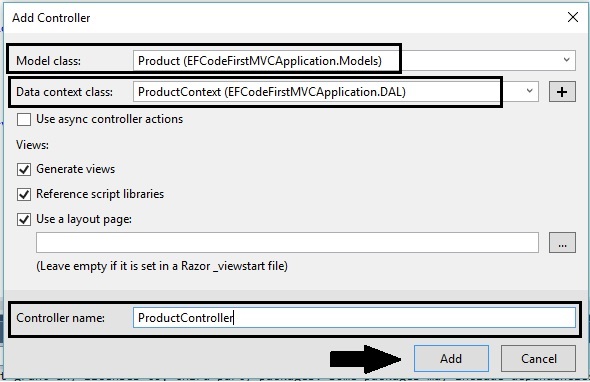
In the Controller dialog box, click “Add” and provide the following information:
Model class: Product (EFCodeFirstMVCApplication.Models)
Data contect class: ProductContext (EFCodeFirstMVCApplication.DAL)
Controller name: ProductController
This should automatically add pages for add, edit, details and delete like this:
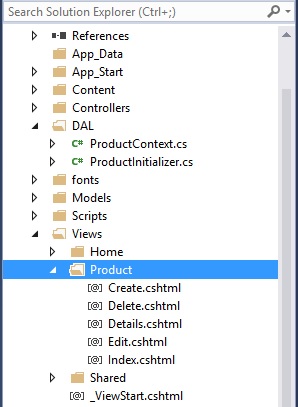
Now, if we run the web application, we should be able to see the product list page by going to: /Product
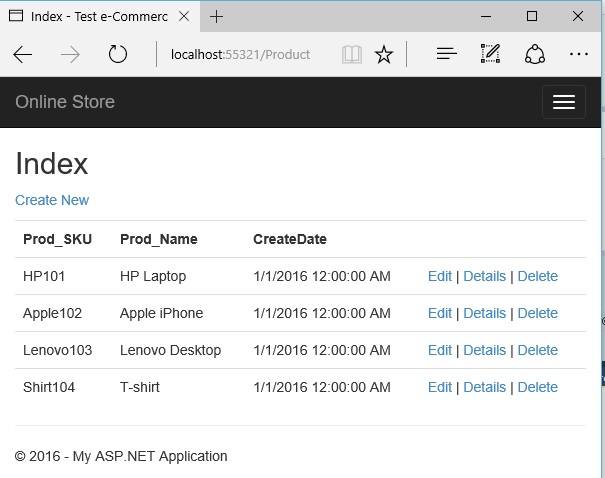
This should automatically add pages for add, edit, details and delete like this:
Now, if we run the web application, we should be able to see the product list page by going to: /Product
A great example of Entity Framework Code-First approach: nopCommerce
Now, that we understand what is entity framework code-first approach and how to perform basic CRUD (create, read, update & delete) operations. Let’s look into an open source ecommerce software which is based on ASP.NET MVC and follows this approach (Project Name: nopCommerce). The code base of nopCommerce follows best practices like Inversion of Control, Separation of Concerns, ORM, Automapping, etc and is always updated with the latest versions of ASP.NET MVC. nopCommerce offers a ready to use data layer using the newest Entity Framework with Code First and Fluent API, both making it very easy to extend.
nopCommerce can be download here: http://www.nopcommerce.com/downloads.aspx
nopCommerce is also available in Microsoft web app gallery: https://www.microsoft.com/web/gallery/nopcommerce.aspx/en-us
Why developers and designers should choose nopCommerce?
- Can be easily modified and in lesser time compared to other competitive cart solutions because its architecture is very well defined, is predictable
- It is the only well featured shopping cart in ASP.NET MVC framework
- Dependency management via Autofac, which integrates both with MVC and your custom code
- An extensible plugin architecture that works without touching the core
- A built-in user management with all the required features like two-away authentication, password recovery, OpenId and most importantly ACL (access control list) allowing for fine-grained permissions management
- An extensible theming mechanism
- Great quality plugins & themes. More than 1,000 plugins and themes and themes available for ready usage
So, why nopCommerce follows the code-first approach? What are the benefits that nopCommerce project gets by following Entity Framework Code First Approach?
Speedy development: Code first approach allows the nopCommerce development to be faster and much more efficient because it updated the database automatically when the model is changed. So, developers do not have to worry about creating a database which means no manual database intervention is required.
Control on database versions: In code first approach, the database schema is completely based on the code models so it helps in controlling the versions of the database. This way, nopCommerce development team can easily maintain (& release) the increment versions as versioning databases is quite effective in this approach.
POCO: This allows nopCommerce code to be much more cleaner and the developers do not have to deal with a lot of auto-generated code.
Full control: If developers follow “database-first” approach, they are at the mercy of what is generated from the database. Code-first approach allows full control for the model from the source code. It means, nopCommerce developers can easily control every aspect of the code models and the database design.
No EDMX/designer: Following any existing database to generate .edmx models file results in a lot of auto-generated code. Not having to deal with .edmx gives an advantage to nopCommerce developers because it makes source code less bloat and the coded models becomes the database.
Let’s look into the nopCommerce source code organization:
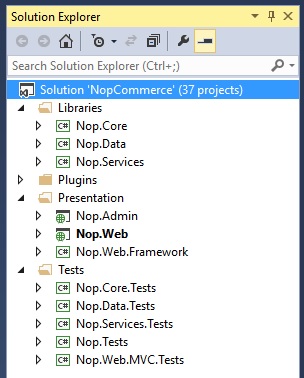
\Libraries\Nop.Core
The Nop.Core project contains a set of core classes for nopCommerce, such as caching, events, helpers, and business objects (for example, Order and Customer entities).
\Libraries\Nop.Data
The Nop.Data project contains a set of classes and functions for reading from and writing to a database or other data store. It helps separate data-access logic from your business objects. nopCommerce uses the Entity Framework (EF) Code-First approach. It allows you to define entities in the source code (all core entities are defined into Nop.Core project), and then get EF to generate the database from that. That's why it's called Code-First. You can then query your objects using LINQ, which gets translated to SQL behind the scenes and executed against the database. nopCommerces use a fluent code API to fully customize the persistence mapping. You can find more about Code-First here or here.
\Libraries\Nop.Services
This project contains a set of core services, business logic, validations or calculations related with the data, if needed. Some people call it Business Access Layer (BAL).
Projects into \Plugins\ solution folder
\Plugins is a Visual Studio solution folder that contains plugin projects. Physically it's located in the root of your solution. But plugins DLLs are automatically copied in \Presentation\Nop.Web\Plugins\ directory which is used for already deployed plugins because the build output paths of all plugins are set to "..\..\Presentation\Nop.Web\Plugins\{Group}.{Name}\". This allows plugins to contain some external files, such as static content (CSS or JS files) without having to copy files between projects to be able to run the project.
\Presentation\Nop.Admin
Nop.Admin is an MVC web application project. If you haven't used ASP.NET MVC before, please find more info here. As you may guess it is a presentation layer for admin area. Physically this project is located under \Presentation\Nop.Web\Administration directory. This project cannot be run.
\Presentation\Nop.Web
Nop.Web is also an MVC web application project, a presentation layer for public store. This is the application that you actually run. It is the startup project of the application.
\Presentation\Nop.Web.Framework
Nop.Web.Framework is a class library project containing some common presentation things for both Nop.Admin and Nop.Web projects.
\Test\Nop.Core.Tests
Nop.Core.Tests is the test project for the Nop.Core project.
\Test\Nop.Data.Tests
Nop.Data.Tests is the test project for the Nop.Data project.
\Test\Nop.Services.Tests
Nop.Services.Tests is the test project for the Nop.Services project.
\Test\Nop.Tests
Nop.Tests is a class library project containing some common test classes and helpers for other test projects. It does not have any test.
\Test\Nop.Web.MVC.Tests
Nop.Web.MVC.Tests is the test project for the presentation layer projects.
For more details, you can refer to nopCommerce documentation: http://docs.nopcommerce.com/display/nc/nopCommerce+Documentation
Adding a new property
Let’s try adding a new property (new field) to the “Category Table” in nopCommerce database. In order to do so, first we need to define the property (field) which can be done in this location:
\Libraries\Nop.Core\Domain\Catalog\Category.cs
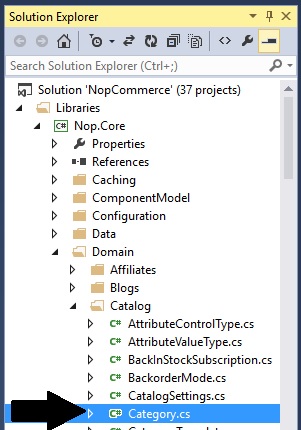
Open Category.cs file and add the property to the Category class:
public string NewTestProperty { get; set; }Your code should look like something like this:
using System;using System.Collections.Generic;using Nop.Core.Domain.Discounts;using Nop.Core.Domain.Localization;using Nop.Core.Domain.Security;using Nop.Core.Domain.Seo;using Nop.Core.Domain.Stores;namespace Nop.Core.Domain.Catalog{ /// <summary> /// Represents a category /// </summary> public partial class Category : BaseEntity, ILocalizedEntity, ISlugSupported, IAclSupported, IStoreMappingSupported { private ICollection<Discount> _appliedDiscounts; /// <summary> /// OUR TEST PROPERTY /// </summary> public string NewTestProperty { get; set; } /// <summary> /// Gets or sets the name /// </summary> public string Name { get; set; } /// <summary> /// Gets or sets the description /// </summary> public string Description { get; set; }Second steps is to add your new property to the constructor of the CategoryMap class which is location in this location:
\Libraries\Nop.Data\Mapping\Catalog\CategoryMap.cs
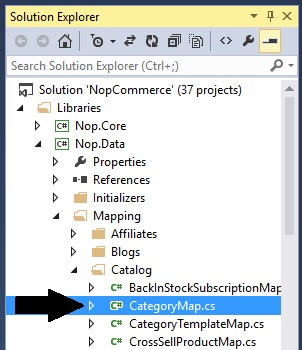
Add this:
this.Property(m => m.NewTestProperty).HasMaxLength(255).IsOptional();Your CategoryMap class should look something like this:
using Nop.Core.Domain.Catalog;namespace Nop.Data.Mapping.Catalog{ public partial class CategoryMap : NopEntityTypeConfiguration<Category> { public CategoryMap() { this.ToTable("Category"); this.HasKey(c => c.Id); this.Property(c => c.Name).IsRequired().HasMaxLength(400); this.Property(c => c.MetaKeywords).HasMaxLength(400); this.Property(c => c.MetaTitle).HasMaxLength(400); this.Property(c => c.PriceRanges).HasMaxLength(400); this.Property(c => c.PageSizeOptions).HasMaxLength(200); //OUR TEST PROPERTY this.Property(m => m.NewTestProperty).HasMaxLength(255).IsOptional(); } }}Now, we if run the project and re-install the database, we should be able to see the new property in the Category Table (in nopCommerce database).
Here is a screenshot of the nopCommerce database that includes the new property that we just added.
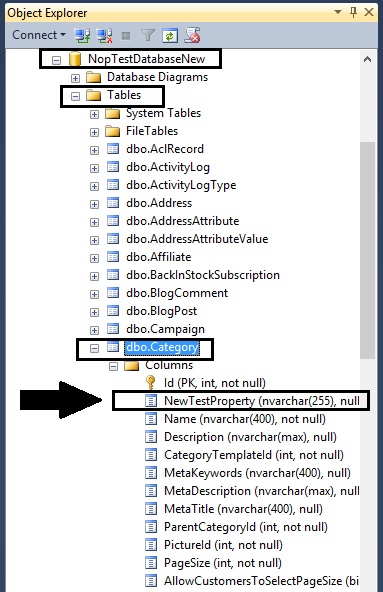
This shows that how easy it is to add new properties in nopCommerce database by following Entity Framework Code-First approach. As we have learned in the above article (tutorial) the classes are created first and then database is generated from the classes to fulfill the business needs. nopCommerce is a great example that follows this approach and helps developers in customizing the solution easily as per the requirement(s) or business needs.
nopCommerce can be download here: http://www.nopcommerce.com/downloads.aspx
nopCommerce Version (used in this article): Version 3.70
I'm Reading different blogs and what do you think about this ?
http://tech.sunnyw.net/2013/12/nopcommerce-create-new-sql-table-domain.html?m=1
The blog post link that you posted above is a solution for making changes in the core functionality but the customization is being done in the main nopCommerce solution so with every upgrade you would have to repeat the whole process. Creating a plugin is one of the cleanest method to add custom features to your nopCommerce site because it takes advantage of pluggable modular/layered architecture which allows additional functionality and presentation elements to be dynamically added to the application at runtime. This way you do not have to touch the default project at all.
I would recommend going through the documentation: http://docs.nopcommerce.com/display/nc/Developer+Guide
See this article also: http://www.strivingprogrammers.com/Blog/post/Lavish-Kumar/2122/Beginners-guide-to-nopCommerce-plugin-development-ASP-NET-MVC-based-e-Commerce-solution/
Invalid column name 'NewTestProperty'. is comming error
please tell me how can slow error,
Could you please provide more details? What version of nopCommerce are you using? What steps have followed? In what steps you are getting an error message?
i am using version 3.70, first i create new property in library >nop.core>domain> catalog> add property in category,like >>> public string NewTestProperty { get; set;}
After that also change in nop.data>mapping>catalog>Add new
property in category like >>this.Property(m => m.NewTestProperty).HasMaxLength(255).IsOptional(); ,,after that my application did not run,only error is showing.
What error message are you getting?
Also - Did you re-build your project after making changes in the code? If no, please do so.
[link="http://www.google.com"] google [/link]
[url=http://www.google.com] google[/url]
[google](http://www.google.com)
[[http://www.google.com|google ]]
[http://www.google.com google ]
[a=http://www.google.com] google[/a]
http://www.google.com
<a href="http://www.google.com"> google </a>