In order to overcome this issue, a feature (option) was added to the nopCommerce project in the administration section that allows store admins to add custom fields in a user-friendly way.
Today we will go over this long awaited feature that was added to nopCommerce !
In order to add custom fields (which can be added easily in the "Register" page", go to:
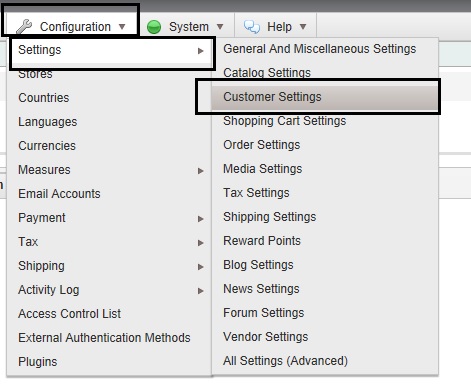
Administration > Configuration > Settings > Customer Settings
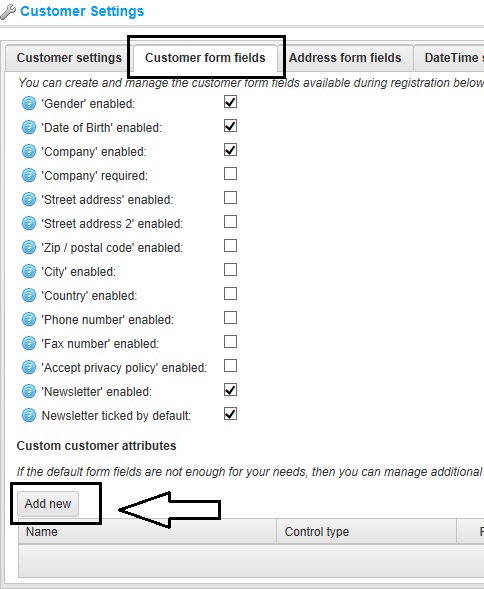
Go to "Customer form fields" tab and at the bottom you will see the option for adding "Custom customer attributes" - Click on "Add"
For this example, I am going to add a field in the register page as "Select a security question" (in a form of drop down menu)
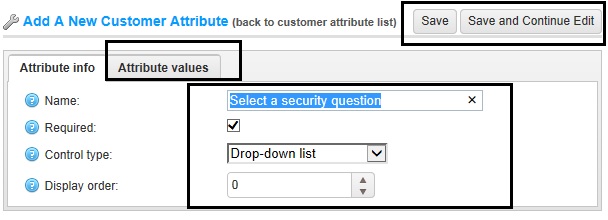
Hit "save and continue" and then click on "Attribute values" tab for adding the dropdown values.
Click on "Add a new customer value" button to fill in the values.
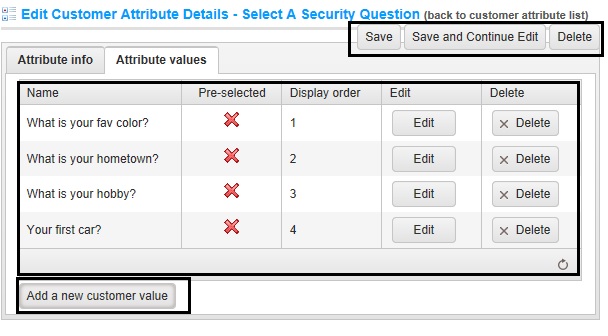
Make sure you "SAVE" all the values.
Now when you logout and go to the public store > Register page
You should see your custom field like this:
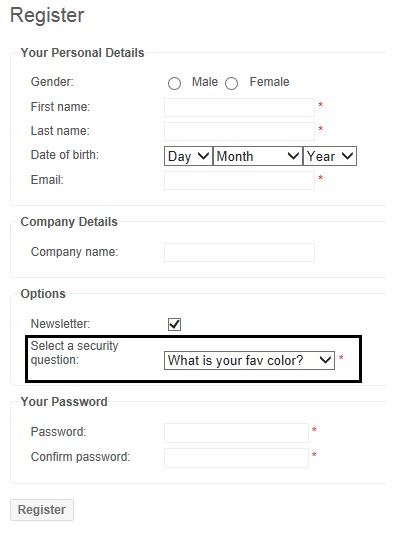
In the case of this example - You can simply add a text box for entering the values for the security question (in same pattern as discussed above).
Hence, you can add custom fields on your "Register" page according to your requirements / needs.
Hope it helps :)
Note: I have used nopCommerce 3.4 for this example
UPDATE: There is an issue (bug) in nopCommerce 3.40 that limits the values to be saved in "custom textbox" field (lengthwise) and user can only save upto certain number of characters (I think 4-5 characters only).
FIX / SOLUTION:
Go to: Nop.Web/Views/Customer/_CustomerAttributes.cshtml
Open the file "_CustomerAttributes.cshtml" and find the following code:
<input name="@(controlId)" type="text" class="textbox" id="@(controlId)" @(!String.IsNullOrWhiteSpace(attribute.DefaultValue) ? " value=" + attribute.DefaultValue : null) />Change it to this:
<input name="@(controlId)" type="text" class="textbox" id="@(controlId)" value="@attribute.DefaultValue" />Save changes and try saving a longer value in your custom textbox - Now, you should be able to save any value (of any length).
Hope it helps!

1) The custom fields are added to "CustomerAttribute" table
2) The value for these custom fields are added to "CustomerAttributeValue" table
Exuse me )
2. Change id and name of custom attribute.
1.How to add validation message for custom field in registration.
ANSWER: By default, you can only add "required" validation to your custom field. If you are looking to add different type of validation then the best way to do that is via Javascript on the client side. Simply inspect the custom field on your browser, get the field information and add the validation in your view.
2. Change id and name of custom attribute.
ANSWER: You cannot change the ID or name of custom attribute because if it dynamic and making changes to the default code (view) might break the functionality. If your requirement is to add a custom field with a specific ID or name attribute then you will have to make customization in the code and not use this dynamic feature of adding custom field. You can customize the code and add the field directly to the customer database table and map everything accordingly.
Hope it helps!
I have updated this article and posted the "fix". Please apply it to your solution and it should resolve your problem.
Thanks for reporting the bug!