You can download the latest version from here: http://www.orchardproject.net/download
For this example, I have downloaded the "full source code" version so that later on I can play with the code by making some modifications.
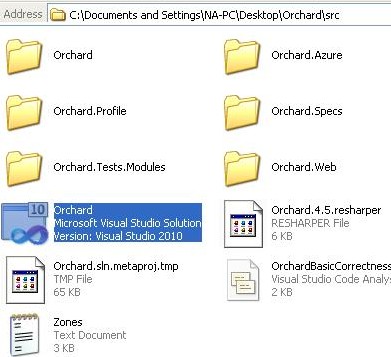
After downloading the latest version of orchard, you will get a zip file which you need to extract in a folder.
After that you will get 2 folders "lib" and "src"
Open the folder "src"
Now open the "Orchard" solution in Visual Studio (just double click on the solution file). You can see the highlighted solution file in the screenshot below:
Once you're solution / project has been loaded up in visual studio, look for "Orchard.Web" > right click on it and select "Set as Startup Project".
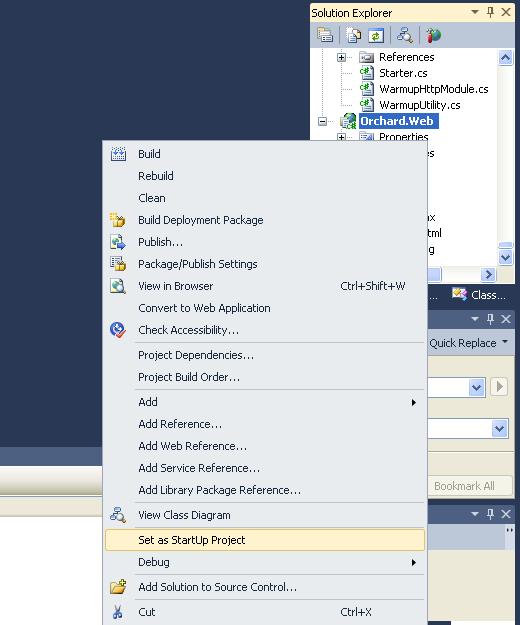
Now built your project or simply press "F5".
Now you should see the installation (Getting Started) screen in your browser.
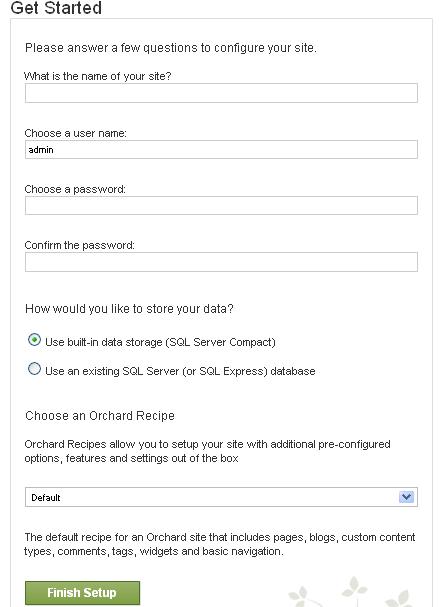
Fill out all the credentials for your website.
What is the name of your site ? (whatever you want to name your website)
Your admin username and password ( which you will use for configuring your website or in other word this user will be the "website owner")
In this example, I am installing Orchard on my local machine so I will select the following option for storing data:
- "Use an existing SQL Server (or SQL Express) database"
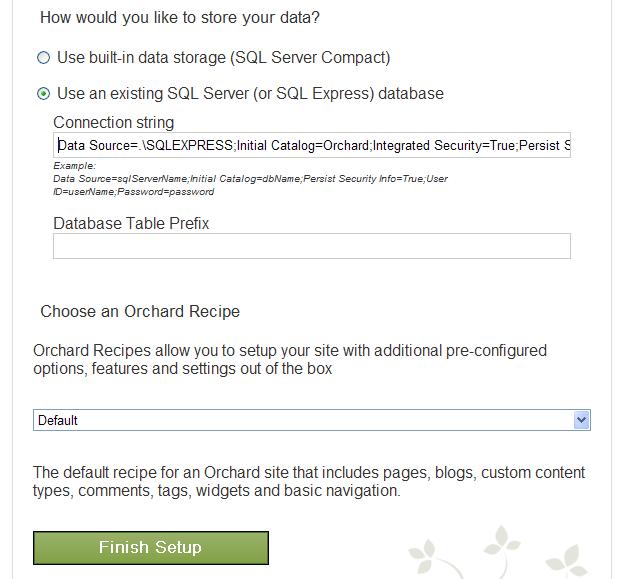
On the other side, create a blank database for this using SQL Server (or SSMS) and let's name it as "Orchard".
Since, we have selected this option "Use an existing SQL Server (or SQL Express) database", we need to provide connection string.
In the connection string I will mention the name of the blank database "Orchard" which I just created so that all the tables and data will be created/stored in this database.
Here is my connection string:
Data Source=.\SQLEXPRESS;Initial Catalog=Orchard;Integrated Security=True;Persist Security Info=False
(If you are installing on a server then you can change it with your server name and add login credentials)
Now press the button "Finish Setup"

If you followed all the steps correctly then within few seconds you will see your website has been installed successfully. Now, you should be able to see your website in the browser like this:
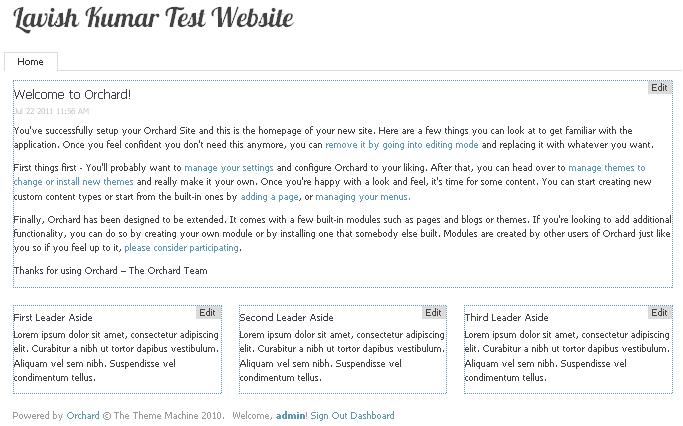
To start setting up your website, click on "Dashboard" (at the bottom of your website).
Your admin section should look like this:
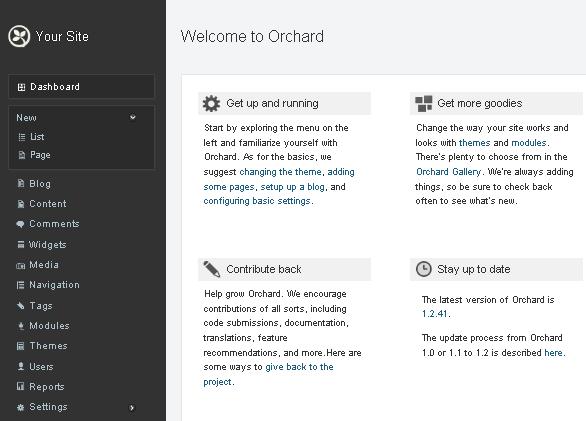
Here you can manage your complete website - You can do a lot of thing like adding new pages, adding blog, managing users, themes, reports etc.
I really hope this helps somebody...