Today, we will discuss, how to add custom links to the footer of your nopCommerce based website.
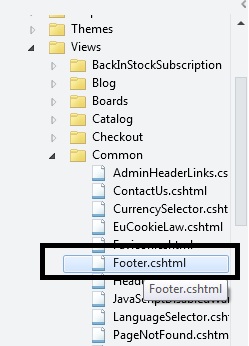
Go to: Nop.Web / Views / Common / Footer.cshtml

When you open the file "Footer.cshtml" and you will see a div block like this:
<div class="footer-menu-wrapper">Within this div, you will see 4 sub div blocks like this:
<div class="column information"><div class="column customer-service"><div class="column my-account"><div class="column follow-us">So, basically, each of these sub-div block can be place for your custom links. You can simply add your custom link like this:
<div class="column information"> <h3>@T("Footer.Information")</h3> <ul> @if (Model.SitemapEnabled) { <li><a href="@Url.RouteUrl("Sitemap")">@T("Sitemap")</a></li> } <li><a href="@Url.RouteUrl("Topic", new {SeName = Html.GetTopicSeName("shippinginfo") })">@T("ShippingReturns")</a></li> <li><a href="@Url.RouteUrl("Topic", new {SeName = Html.GetTopicSeName("privacyinfo") })">@T("PrivacyNotice")</a></li> <li><a href="@Url.RouteUrl("Topic", new {SeName = Html.GetTopicSeName("conditionsofuse") })">@T("ConditionsOfUse")</a></li> <li><a href="@Url.RouteUrl("Topic", new {SeName = Html.GetTopicSeName("aboutus") })">@T("AboutUs")</a></li> <li><a href="@Url.RouteUrl("ContactUs")">@T("ContactUs")</a></li> <li><a href="#">Custom Link 1</a></li> </ul> </div>You can follow the same process for each sub-div block to add your custom links or remove any existing link in order to personalize your store site footer block.
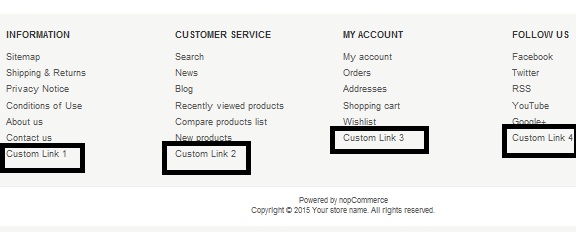
Here is the result:

